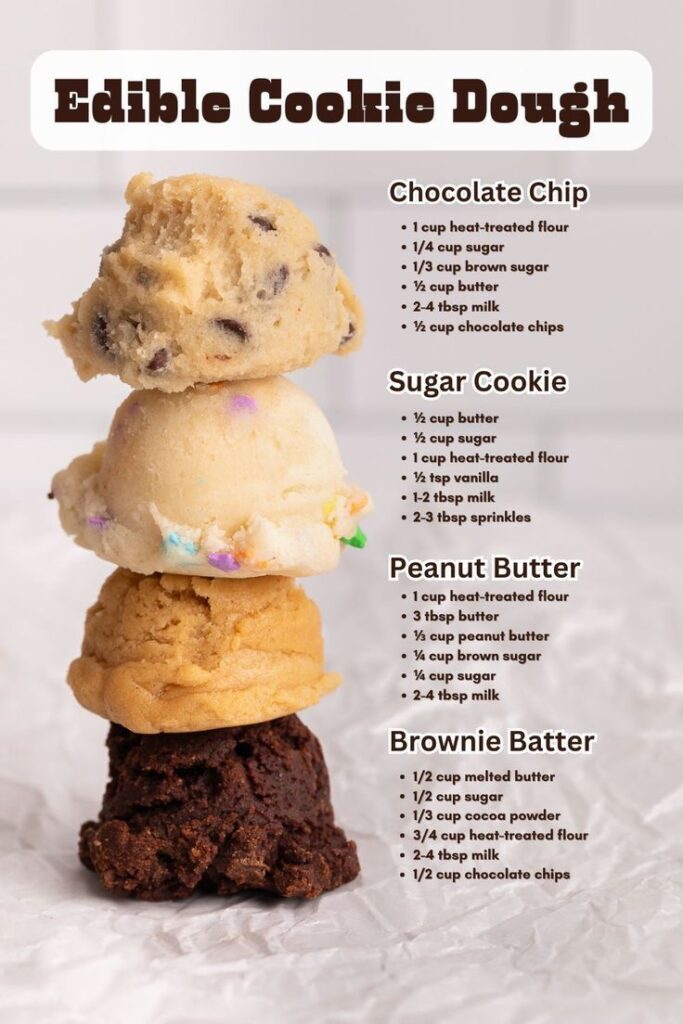
I remember the first time I made cookie dough with my daughter. It was a rainy Saturday, and we were craving something sweet. We didn't have eggs, so I improvised. That day, I discovered the magic of eggless cookie dough – it's safe to eat raw and bakes up just as deliciously. This recipe has been a family favorite ever since.
Advertisements1
This isn't just one recipe; it's a base that you can adapt in endless ways. Whether you want classic chocolate chip cookies, a quick edible treat, or a base for ice cream mix-ins, this dough is your starting point. It's simple, uses pantry staples, and comes together in minutes.
In my kitchen, I love recipes that are forgiving. This one is exactly that – you can adjust the add-ins, the sweetness, even the flour. So let's get started and make some memories (and cookies)!
Why You'll Love This Recipe
About the Ingredients
1 cup (2 sticks / 226g) unsalted butter, softened
Use good quality butter for the best flavor. If you only have salted butter, reduce the added salt to 1/4 teaspoon.
3/4 cup (150g) granulated sugar
Granulated sugar helps create a crisp edge. You can use coconut sugar for a deeper flavor, but the texture will be slightly different.
3/4 cup (165g) packed light brown sugar
Brown sugar adds moisture and chewiness. Dark brown sugar will give a stronger molasses flavor.
1/4 cup (60ml) milk (any kind works)
Milk replaces the liquid that eggs would provide. You can use water or plant-based milk like almond or oat.
2 teaspoons vanilla extract
Pure vanilla extract gives the best flavor. If you only have imitation, use 1 teaspoon and add a pinch of salt.
2 cups (250g) all-purpose flour
All-purpose flour gives the classic texture. For a gluten-free version, use a 1:1 gluten-free flour blend.
1/2 teaspoon baking soda
Baking soda helps the cookies spread. If you're making edible dough, you can omit it, but the texture will be slightly denser.
1/2 teaspoon salt
Salt balances the sweetness. Use fine sea salt for best results.
1 cup (170g) chocolate chips (or other add-ins)
Use your favorite chips – semi-sweet, dark, or white. You can also use chopped nuts, dried fruit, or M&Ms.
Tips & Tricks
Don't overmix the dough
Overmixing develops gluten, making tough cookies. Mix just until the flour is incorporated.
Chill the dough if baking
For thicker, chewier cookies, chill the dough for at least 30 minutes before baking. This prevents spreading.
Use a cookie scoop for even cookies
This ensures uniform size and even baking. If you don't have one, use a tablespoon and roll into balls.
Pro Tips
Step-by-Step Instructions
1. Cream Butter and Sugars
In a large bowl, beat the softened butter, granulated sugar, and brown sugar together with an electric mixer on medium speed until light and fluffy, about 2-3 minutes. This incorporates air, giving your cookies a tender texture.
2. Add Milk and Vanilla
Mix in the milk and vanilla extract until combined. The mixture may look slightly curdled – that's normal. The milk acts as the liquid that eggs would provide, keeping the dough moist.
3. Whisk Dry Ingredients
In a separate bowl, whisk together the flour, baking soda, and salt. Whisking ensures the leavening agent is evenly distributed, so your cookies rise uniformly.
4. Combine Wet and Dry
Gradually add the dry ingredients to the wet mixture, mixing on low speed until just combined. Be careful not to overmix – stop as soon as no streaks of flour remain.
5. Fold in Chocolate Chips
Gently fold in the chocolate chips with a spatula. If you're making edible dough, you can stop here and enjoy! For baked cookies, continue.
6. Chill the Dough (Optional)
For best results, cover the dough and refrigerate for at least 30 minutes. Chilling solidifies the fat, which prevents excessive spreading and results in thicker, chewier cookies.
7. Preheat Oven and Scoop
Preheat your oven to 350°F (175°C). Line baking sheets with parchment paper. Scoop the dough into 1.5-tablespoon balls and place them 2 inches apart on the prepared sheets.
8. Bake Until Golden
Bake for 10-12 minutes, or until the edges are golden brown and the centers are just set. The tops should look slightly shiny. They will continue to bake on the hot sheet, so don't overbake.
9. Cool and Enjoy
Let the cookies cool on the baking sheet for 5 minutes, then transfer to a wire rack to cool completely. For edible dough, simply serve chilled or at room temperature.
Delicious Variations
Oatmeal Raisin
Replace 1 cup of flour with 1 cup old-fashioned oats and add 1 teaspoon cinnamon. Swap chocolate chips for raisins.
Peanut Butter
Reduce butter to 1/2 cup and add 1/2 cup peanut butter. Add 1/4 cup chopped peanuts for crunch.
Double Chocolate
Replace 2 tablespoons of flour with 2 tablespoons unsweetened cocoa powder. Add white chocolate chips instead of semi-sweet.
How to Store Recipes For Cookie Dough
Refrigerator
Store baked cookies in an airtight container at room temperature for up to 1 week. Edible dough can be refrigerated for up to 3 days.
Freezer
Freeze unbaked dough balls on a baking sheet until solid, then transfer to a zip-top bag for up to 3 months. Baked cookies also freeze well for up to 3 months.
Reheating
To refresh baked cookies, place them in a 300°F (150°C) oven for 5-7 minutes. For frozen dough, bake directly from frozen, adding 2-3 minutes to the bake time.
Frequently Asked Questions
Q: Is it safe to eat raw cookie dough without eggs?
Yes, this recipe is eggless, so it's safe to eat raw. However, the flour may still contain bacteria, so if you're concerned, you can heat-treat the flour in a 350°F oven for 5 minutes before using.
Q: Can I use this dough for ice cream?
Absolutely! This dough is perfect for mixing into ice cream. Just crumble it into small pieces and fold into softened ice cream, then freeze.
Q: Why do my cookies spread too much?
Spreading usually happens if the dough is too warm or the butter is too soft. Chilling the dough for at least 30 minutes before baking helps prevent this.
Q: Can I make this dough gluten-free?
Yes, simply substitute the all-purpose flour with a 1:1 gluten-free flour blend. The texture may be slightly different, but they'll still be delicious.
Q: How do I make this dough vegan?
Use plant-based butter and a non-dairy milk like almond or oat. The rest of the ingredients are already vegan, so it's an easy swap.
Try making this dough tonight – whether you bake it or eat it straight from the bowl, I'd love to hear how it goes. Leave a comment below and share your favorite add-in combination! Happy organizing!
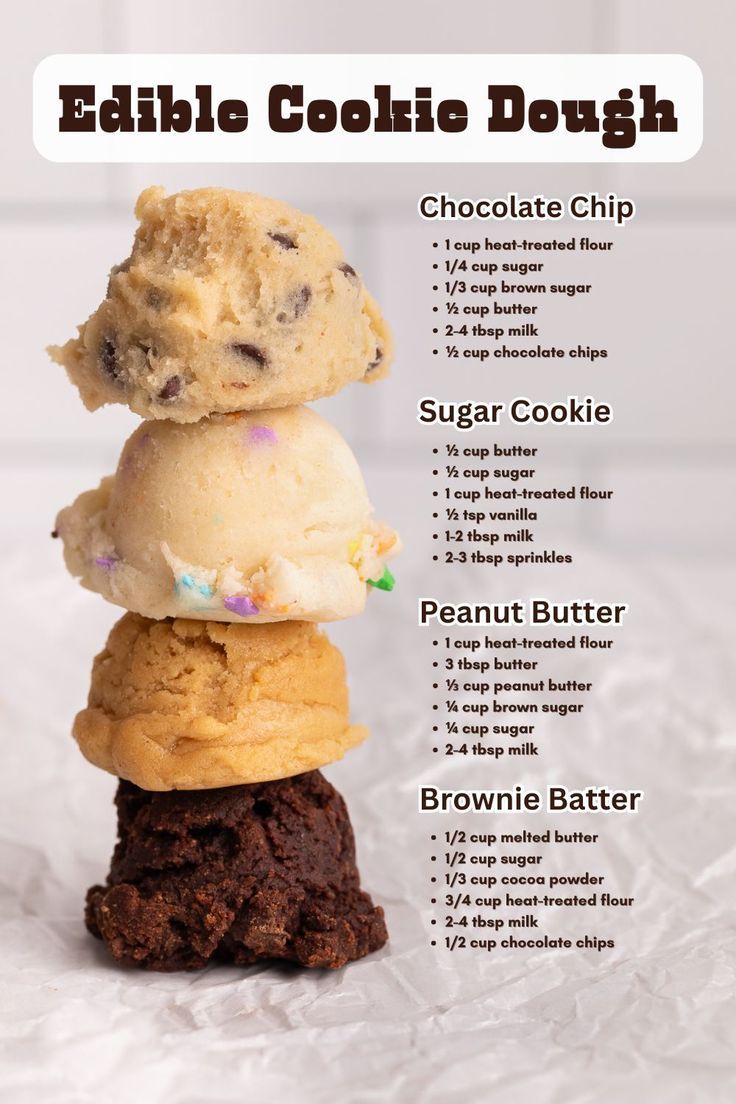
Recipes For Cookie Dough
Recipes For Cookie Dough: a versatile, eggless dough that's perfect for baking or eating raw. Ready in 30 minutes!
🧂 Ingredients
- 1 cup (2 sticks / 226g) unsalted butter, softened
- 3/4 cup (150g) granulated sugar
- 3/4 cup (165g) packed light brown sugar
- 1/4 cup (60ml) milk (any kind works)
- 2 teaspoons vanilla extract
- 2 cups (250g) all-purpose flour
- 1/2 teaspoon baking soda
- 1/2 teaspoon salt
- 1 cup (170g) chocolate chips (or other add-ins)
📋 Instructions
- 1Cream Butter and Sugars — In a large bowl, beat the softened butter, granulated sugar, and brown sugar together with an electric mixer on medium speed until light and fluffy, about 2-3 minutes. This incorporates air, giving your cookies a tender texture.
- 2Add Milk and Vanilla — Mix in the milk and vanilla extract until combined. The mixture may look slightly curdled – that's normal. The milk acts as the liquid that eggs would provide, keeping the dough moist.
- 3Whisk Dry Ingredients — In a separate bowl, whisk together the flour, baking soda, and salt. Whisking ensures the leavening agent is evenly distributed, so your cookies rise uniformly.
- 4Combine Wet and Dry — Gradually add the dry ingredients to the wet mixture, mixing on low speed until just combined. Be careful not to overmix – stop as soon as no streaks of flour remain.
- 5Fold in Chocolate Chips — Gently fold in the chocolate chips with a spatula. If you're making edible dough, you can stop here and enjoy! For baked cookies, continue.
- 6Chill the Dough (Optional) — For best results, cover the dough and refrigerate for at least 30 minutes. Chilling solidifies the fat, which prevents excessive spreading and results in thicker, chewier cookies.
- 7Preheat Oven and Scoop — Preheat your oven to 350°F (175°C). Line baking sheets with parchment paper. Scoop the dough into 1.5-tablespoon balls and place them 2 inches apart on the prepared sheets.
- 8Bake Until Golden — Bake for 10-12 minutes, or until the edges are golden brown and the centers are just set. The tops should look slightly shiny. They will continue to bake on the hot sheet, so don't overbake.
- 9Cool and Enjoy — Let the cookies cool on the baking sheet for 5 minutes, then transfer to a wire rack to cool completely. For edible dough, simply serve chilled or at room temperature.

Marta writes about home organization and decluttering, focusing on simple systems that work for busy families. She shares practical tips for turning chaotic spaces into calm, functional areas.