
Picture this: a golden, crunchy shell that gives way to a creamy, savory rice interior, with a molten mozzarella heart. That's the magic of Italian rice balls, or arancini. They're the ultimate comfort food—part snack, part meal, and entirely satisfying.
Advertisements1
I'll guide you through the science of getting that perfect crisp exterior without the greasiness, using a few chef's tricks. Think of it as building a tiny, edible fortress: the rice is the wall, the cheese is the treasure, and the fryer is the moat of fire.
Whether you're hosting a party or craving a cozy dinner, these rice balls are a showstopper. Let's dive in and make your kitchen smell like a Sicilian trattoria.
Why You'll Love This Recipe
About the Ingredients
2 cups (400g) Arborio rice
Arborio's high starch content gives the creamiest texture. Substitute with Carnaroli or Vialone Nano for similar results.
4 cups (950ml) chicken or vegetable broth
Use low-sodium to control salt. Homemade broth adds depth, but a good quality store-bought works fine.
1/2 cup (50g) grated Parmesan cheese
Freshly grated melts better than pre-shredded. Pecorino Romano is a sharp substitute.
1 large egg, beaten
Helps bind the rice. For an egg-free version, use a flax egg (1 tbsp ground flax + 3 tbsp water).
1 cup (120g) all-purpose flour
For dredging. Gluten-free all-purpose blends work too.
2 large eggs, beaten (for coating)
The glue for the breadcrumbs. Use a non-dairy milk + cornstarch mix if needed.
1 1/2 cups (150g) breadcrumbs (preferably panko)
Panko gives extra crunch. Regular breadcrumbs are finer, so use less and press firmly.
8 oz (225g) mozzarella cheese, cut into 1/2-inch cubes
Low-moisture mozzarella melts without making the rice soggy. Fresh mozzarella works but drain it well.
Vegetable oil for frying (about 2 cups / 500ml)
Use a neutral oil with a high smoke point like canola or peanut. Avoid olive oil—it burns at high temps.
Salt and pepper, to taste
Season the rice well; it's your base flavor. Add a pinch of nutmeg for warmth if you like.
Tips & Tricks
Don't overcook the rice
It should be al dente—still slightly firm—because it will cook more during frying. Overcooked rice makes mushy balls.
Chill the rice mixture
Chilling for at least 30 minutes makes it easier to shape and prevents the balls from falling apart. Patience is key.
Fry in batches
Overcrowding the pan drops the oil temperature, leading to greasy, soggy arancini. Give them room to crisp.
Pro Tips
Step-by-Step Instructions
1. Cook the rice
In a large saucepan, bring broth to a boil. Stir in rice, reduce heat to low, cover, and simmer for 15-18 minutes until liquid is absorbed and rice is al dente. Spread on a baking sheet to cool.
2. Season the rice
Once cooled, transfer rice to a bowl. Mix in Parmesan, beaten egg, salt, and pepper. The mixture should be sticky enough to hold together when squeezed.
3. Shape the balls
Scoop about 2 tablespoons of rice mixture and flatten in your palm. Place a mozzarella cube in the center, then wrap the rice around it, forming a ball. Repeat with remaining mixture.
4. Set up breading station
Place flour, beaten eggs, and breadcrumbs in three separate shallow bowls. Season flour with salt and pepper.
5. Coat the balls
Roll each ball in flour, dip in egg, then roll in breadcrumbs. Press gently to adhere. For a thicker crust, repeat the egg and breadcrumb steps.
6. Chill the coated balls
Arrange breaded balls on a parchment-lined tray. Refrigerate for at least 30 minutes. This helps them hold their shape during frying.
7. Heat the oil
In a deep pot, heat 2 inches of oil to 350°F (175°C). Use a thermometer to maintain the temperature. If you don't have one, drop a breadcrumb—it should sizzle and float.
8. Fry until golden
Carefully add balls in batches, avoiding overcrowding. Fry for 4-5 minutes, turning occasionally, until golden brown and crispy all over. The internal temperature should reach 165°F (74°C). Drain on paper towels.
9. Serve and enjoy
Let rest for 2 minutes before serving. The cheese will be molten—caution! Serve warm with marinara sauce for dipping.
Delicious Variations
Classic Meat Filling
Add cooked ground beef or sausage mixed with peas and tomato sauce to the rice.
Spinach and Ricotta
Sauté spinach with garlic, mix with ricotta, and use as a filling instead of mozzarella.
Pesto and Sun-Dried Tomato
Swirl pesto into the rice and add a sun-dried tomato piece with the cheese.
How to Store Italian Rice Ball
Refrigerator
Store cooked rice balls in an airtight container in the fridge for up to 3 days.
Freezer
Freeze uncooked breaded balls on a tray, then transfer to a freezer bag for up to 3 months. Fry from frozen, adding 2-3 minutes to cooking time.
Reheating
Reheat in a preheated oven at 375°F (190°C) for 10-12 minutes to regain crispness. Avoid microwaving—it makes them soggy.
Frequently Asked Questions
Q: Can I make Italian rice balls ahead of time?
Yes, you can prepare and bread them up to a day ahead, then refrigerate. Fry just before serving for best results.
Q: What is the best rice for arancini?
Arborio rice is the best because its high starch content creates a creamy texture that holds together well. Carnaroli or Vialone Nano also work.
Q: Can I bake instead of fry?
Yes, you can bake them at 400°F (200°C) for 20-25 minutes, brushing with oil halfway. They'll be less crispy but still tasty.
Q: Why do my rice balls fall apart?
They likely fall apart because the rice was too dry or not chilled enough. Make sure to chill the rice mixture and shape them firmly.
Q: What can I use instead of mozzarella?
You can use provolone, fontina, or a mix of cheeses. Just ensure they melt well and are cut into small cubes.
Now you're ready to impress your family and friends with golden, cheesy Italian rice balls. Try this recipe tonight and let me know how they turn out in the comments below!
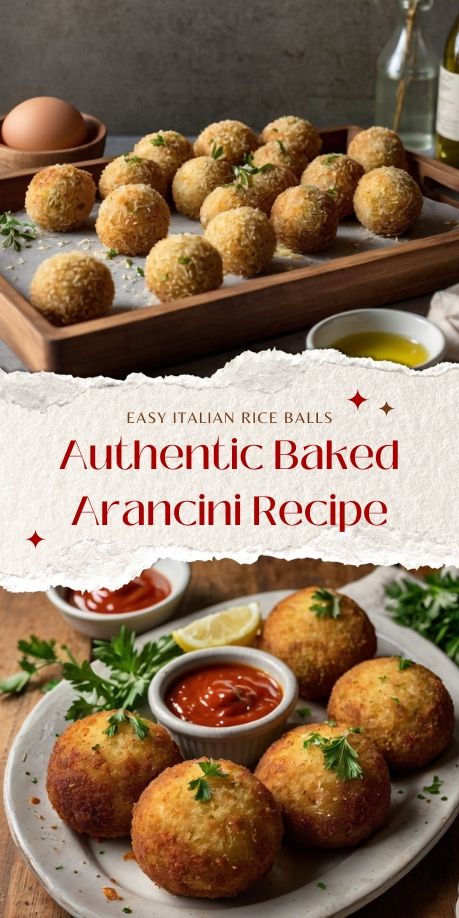
Italian Rice Ball
Savor crispy Italian Rice Balls with gooey mozzarella centers—a family favorite that's surprisingly easy to make at home.
🧂 Ingredients
- 2 cups (400g) Arborio rice
- 4 cups (950ml) chicken or vegetable broth
- 1/2 cup (50g) grated Parmesan cheese
- 1 large egg, beaten
- 1 cup (120g) all-purpose flour
- 2 large eggs, beaten (for coating)
- 1 1/2 cups (150g) breadcrumbs (preferably panko)
- 8 oz (225g) mozzarella cheese, cut into 1/2-inch cubes
- Vegetable oil for frying (about 2 cups / 500ml)
- Salt and pepper, to taste
📋 Instructions
- 1Cook the rice — In a large saucepan, bring broth to a boil. Stir in rice, reduce heat to low, cover, and simmer for 15-18 minutes until liquid is absorbed and rice is al dente. Spread on a baking sheet to cool.
- 2Season the rice — Once cooled, transfer rice to a bowl. Mix in Parmesan, beaten egg, salt, and pepper. The mixture should be sticky enough to hold together when squeezed.
- 3Shape the balls — Scoop about 2 tablespoons of rice mixture and flatten in your palm. Place a mozzarella cube in the center, then wrap the rice around it, forming a ball. Repeat with remaining mixture.
- 4Set up breading station — Place flour, beaten eggs, and breadcrumbs in three separate shallow bowls. Season flour with salt and pepper.
- 5Coat the balls — Roll each ball in flour, dip in egg, then roll in breadcrumbs. Press gently to adhere. For a thicker crust, repeat the egg and breadcrumb steps.
- 6Chill the coated balls — Arrange breaded balls on a parchment-lined tray. Refrigerate for at least 30 minutes. This helps them hold their shape during frying.
- 7Heat the oil — In a deep pot, heat 2 inches of oil to 350°F (175°C). Use a thermometer to maintain the temperature. If you don't have one, drop a breadcrumb—it should sizzle and float.
- 8Fry until golden — Carefully add balls in batches, avoiding overcrowding. Fry for 4-5 minutes, turning occasionally, until golden brown and crispy all over. The internal temperature should reach 165°F (74°C). Drain on paper towels.
- 9Serve and enjoy — Let rest for 2 minutes before serving. The cheese will be molten—caution! Serve warm with marinara sauce for dipping.

Liam writes about personal finance for young professionals, covering budgeting, saving, and investing basics. He focuses on debunking myths and building long-term financial habits.