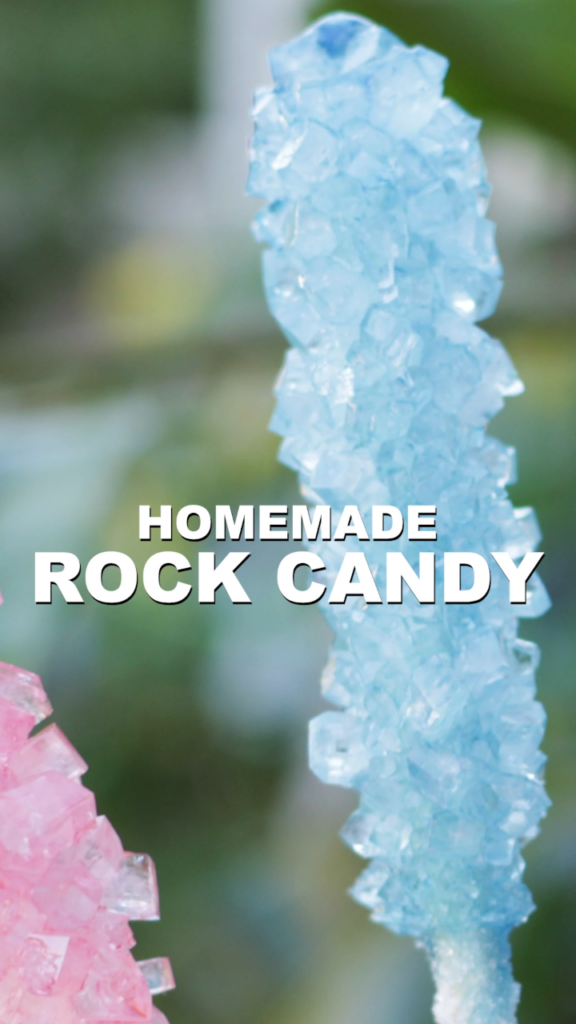
Welcome to my kitchen, where we're turning simple sugar and water into edible gems! Today, I'm sharing my foolproof method for how to make rock candy with sugar. It's a magical process that feels like a science experiment you can eat.
Advertisements1
Watching those tiny crystals grow day by day is pure joy, and the final result – a crunchy, sweet lollipop – is worth the wait. This recipe is simple, budget-friendly, and a fantastic activity to do with kids (with a little grown-up help for the hot syrup).
Whether you're making these for a party favor, a homemade gift, or just a fun weekend project, these sparkly sugar crystals are sure to impress. Let's get started!
Why You'll Love This Recipe
About the Ingredients
3 cups (600g) granulated sugar
The main ingredient for your crystals. Use pure cane sugar for best results; you can also try organic sugar but avoid powdered sugar as it contains additives.
1 cup (240ml) water
Filtered water works best; tap water with high mineral content can affect crystal clarity. You can also use distilled water for the clearest crystals.
1/2 teaspoon (3g) salt
Just a pinch helps the crystals form more uniformly. Use regular table salt; sea salt or kosher salt also work fine.
1 teaspoon (5ml) vanilla extract (optional)
Adds a subtle flavor. You can use almond extract, peppermint, or any flavoring you like. For a fruity twist, try a few drops of citrus essential oil.
Food coloring (optional)
Gel food coloring gives vibrant colors without changing the syrup's consistency. Liquid food coloring works too, but you may need more to get a deep hue.
6 wooden skewers or candy sticks
Wooden sticks are ideal for crystal growth. You can also use bamboo skewers or lollipop sticks. Avoid plastic as it may not grip the crystals well.
6 clothespins or clips
These hold the sticks in place while the crystals grow. Any small clip works, or you can use a piece of tape to secure a string across the jar.
6 glass jars or tall glasses
Wide-mouth jars are best for easy dipping. Make sure they are clean and dry to prevent unwanted crystal formation.
Tips & Tricks
Be patient
Crystals take 3-7 days to grow fully. Resist the urge to disturb them.
Start with a clean jar
Any residue can cause crystals to form on the sides instead of on your stick.
Use the right sugar-to-water ratio
This recipe creates a supersaturated solution, which is essential for crystallization.
Pro Tips
Step-by-Step Instructions
1. Prep the Sticks
Wet the top 2 inches of each wooden stick with water, then roll them in a small amount of sugar. This gives the crystals a rough surface to attach to. Set them aside to dry completely while you make the syrup.
2. Dissolve the Sugar
In a saucepan, combine the water and salt. Bring to a gentle boil over medium heat. Gradually add the sugar, stirring constantly until fully dissolved. This should take about 5-7 minutes. The syrup will be clear and slightly thickened.
3. Flavor and Color
Remove the syrup from heat. Stir in the vanilla extract and food coloring, if using. If you want multiple colors, divide the syrup into separate bowls and color each one.
4. Cool the Syrup
Let the syrup cool for 15-20 minutes until it's warm but not too hot to touch. This prevents the sticks from warping and helps the crystals form slowly.
5. Fill the Jars
Pour the syrup into your clean glass jars, filling each about 3/4 full. Leave room for the sticks and any potential overflow.
6. Insert the Sticks
Place a prepared stick into each jar, making sure it doesn't touch the bottom or sides. Use a clothespin clipped to the top of the stick to hold it in place, leaving about 1 inch of the stick submerged in syrup.
7. Wait and Watch
Set the jars in a cool, undisturbed place (a counter or windowsill works well). Cover loosely with a paper towel or coffee filter. Check daily – you'll see small crystals forming within 24 hours.
8. Harvest the Candy
After 3-7 days (or when crystals are as big as you like), carefully lift the sticks out of the syrup. Let them drain and dry on a wire rack for a few hours. Once dry, they're ready to enjoy!
Delicious Variations
Flavored Rock Candy
Use different extracts like peppermint, almond, or coconut for varied flavors.
Colored Rock Candy
Add gel food coloring in festive colors for holidays or parties.
Citrus Zest
Add a strip of lemon or orange zest to the syrup for a bright, tangy twist.
How to Store How To Make Rock Candy With Sugar
Refrigerator
Store rock candy in an airtight container at room temperature for up to 2 weeks. Do not refrigerate as moisture can make it sticky.
Freezer
You can freeze rock candy in an airtight container for up to 3 months. Let it come to room temperature before serving to avoid condensation.
Reheating
No reheating needed. If it becomes sticky, place it in a warm oven (200°F / 95°C) for 5 minutes to crisp up.
Frequently Asked Questions
Q: How long does rock candy take to grow?
Rock candy typically takes 3 to 7 days to grow, depending on the temperature and humidity. You'll see small crystals within 24 hours, and they'll get bigger each day.
Q: Why is my rock candy not forming?
If crystals aren't forming, the syrup may not be supersaturated enough, or the solution may have been disturbed. Make sure you dissolved all the sugar completely and let it cool undisturbed.
Q: Can I use brown sugar instead of white?
Yes, you can use brown sugar, but the crystals will be darker and have a molasses flavor. The process works the same, but the color may be less clear.
Q: How do I get bigger crystals?
To get bigger crystals, use a slightly larger ratio of sugar to water (like 3.5 cups sugar to 1 cup water) and allow more time for growth. Also, keep the jars in a warm, stable place.
Q: Is rock candy safe for kids to make?
Yes, with adult supervision, especially for the hot syrup part. Kids can help with measuring, stirring, and watching the crystals grow – it's a great science lesson!
Now that you know how to make rock candy with sugar, I'd love to see your colorful creations! Tag me in your photos and share your crystal-growing adventures in the comments below. Happy sweet making!
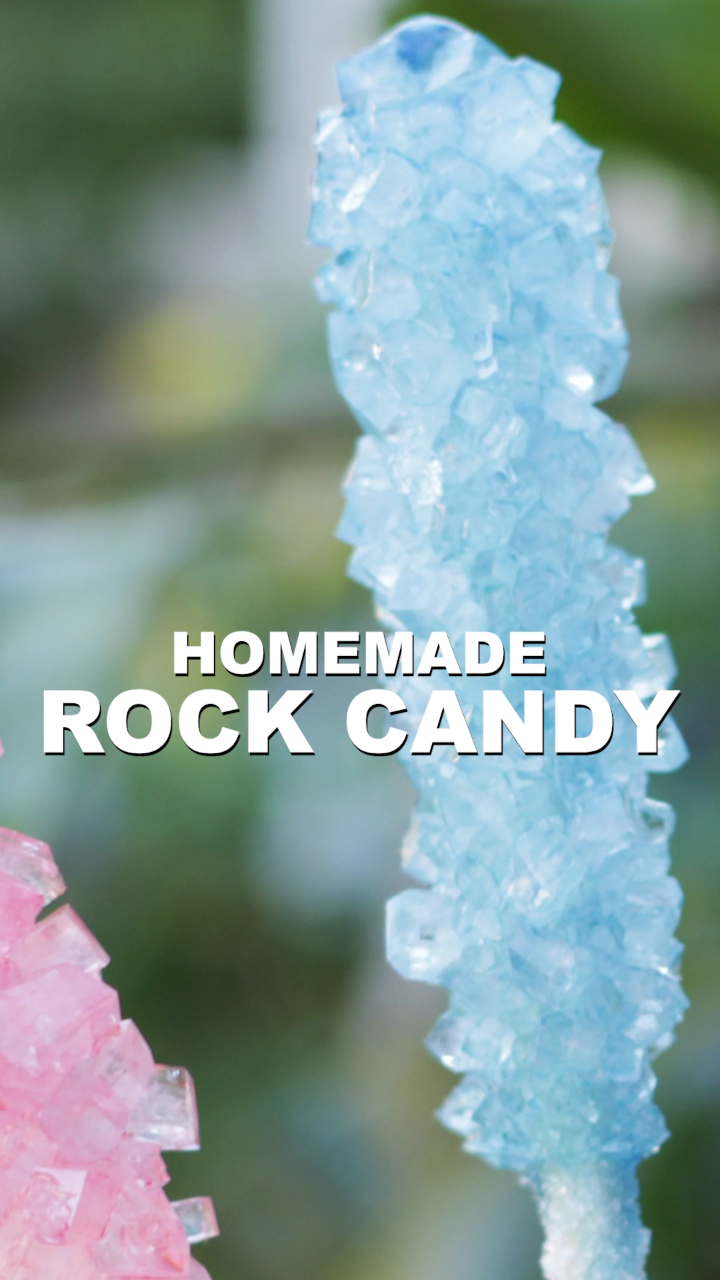
How To Make Rock Candy With Sugar
Learn how to make rock candy with sugar at home. This easy science-sweet treat yields sparkling, crunchy crystals on a stick. Perfect for gifts.
🧂 Ingredients
- 3 cups (600g) granulated sugar
- 1 cup (240ml) water
- 1/2 teaspoon (3g) salt
- 1 teaspoon (5ml) vanilla extract (optional)
- Food coloring (optional)
- 6 wooden skewers or candy sticks
- 6 clothespins or clips
- 6 glass jars or tall glasses
📋 Instructions
- 1Prep the Sticks — Wet the top 2 inches of each wooden stick with water, then roll them in a small amount of sugar. This gives the crystals a rough surface to attach to. Set them aside to dry completely while you make the syrup.
- 2Dissolve the Sugar — In a saucepan, combine the water and salt. Bring to a gentle boil over medium heat. Gradually add the sugar, stirring constantly until fully dissolved. This should take about 5-7 minutes. The syrup will be clear and slightly thickened.
- 3Flavor and Color — Remove the syrup from heat. Stir in the vanilla extract and food coloring, if using. If you want multiple colors, divide the syrup into separate bowls and color each one.
- 4Cool the Syrup — Let the syrup cool for 15-20 minutes until it's warm but not too hot to touch. This prevents the sticks from warping and helps the crystals form slowly.
- 5Fill the Jars — Pour the syrup into your clean glass jars, filling each about 3/4 full. Leave room for the sticks and any potential overflow.
- 6Insert the Sticks — Place a prepared stick into each jar, making sure it doesn't touch the bottom or sides. Use a clothespin clipped to the top of the stick to hold it in place, leaving about 1 inch of the stick submerged in syrup.
- 7Wait and Watch — Set the jars in a cool, undisturbed place (a counter or windowsill works well). Cover loosely with a paper towel or coffee filter. Check daily – you'll see small crystals forming within 24 hours.
- 8Harvest the Candy — After 3-7 days (or when crystals are as big as you like), carefully lift the sticks out of the syrup. Let them drain and dry on a wire rack for a few hours. Once dry, they're ready to enjoy!

Aisha writes about plant-based cooking and nutrition, focusing on affordable, flavorful meals for everyday life. She shares tips for meal prepping and using seasonal ingredients.