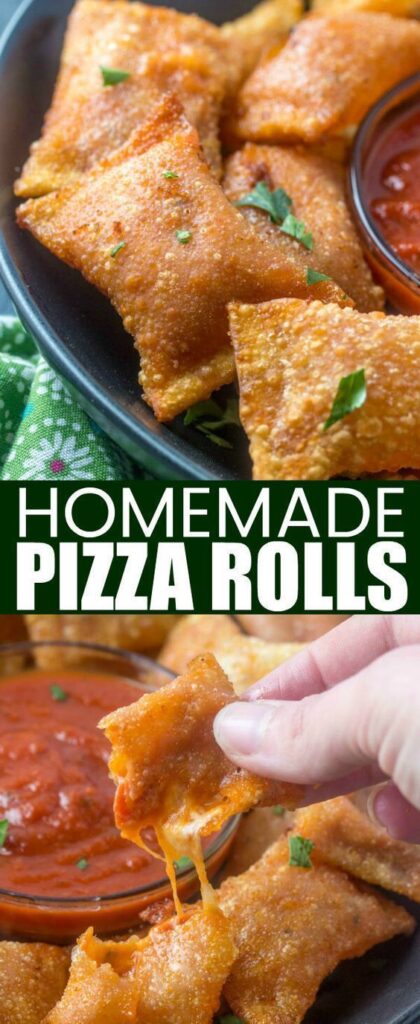
These Easy Homemade Pizza Rolls are my go-to when the craving for pizza hits but I don't want to wait for delivery. They're crispy on the outside, cheesy on the inside, and come together in about 30 minutes.
Advertisements1
I've tested this dough countless times to get the perfect balance of crispy and tender. The key is a hot oven and a quick bake. No fancy equipment needed – just a rolling pin and a baking sheet.
Whether it's game day, a weeknight dinner, or a party appetizer, these rolls are a crowd-pleaser. Make a batch and watch them disappear.
Why You'll Love This Recipe
About the Ingredients
1 pound (450g) store-bought pizza dough
Look for fresh dough in the refrigerated section of your grocery store. You can also use homemade dough or thawed frozen bread dough.
1/2 cup (120ml) pizza sauce
Use your favorite jarred sauce or make your own. For a spicier kick, try arrabbiata sauce.
2 cups (200g) shredded mozzarella cheese
Low-moisture mozzarella melts best. You can also use a pizza blend or provolone.
1/4 cup (25g) grated Parmesan cheese
Adds a salty, nutty flavor. Substitute with Pecorino Romano if you like.
2 ounces (56g) pepperoni slices, chopped
Use regular or turkey pepperoni. For a veggie version, omit or use sautéed mushrooms.
1 tablespoon (15ml) olive oil
For brushing the rolls. Use a neutral oil if you prefer.
1 teaspoon Italian seasoning
A blend of oregano, basil, and thyme. If you don't have it, mix dried oregano and basil.
1/2 teaspoon garlic powder
Adds savory depth. Fresh minced garlic can be used but watch it doesn't burn.
1 egg, beaten (for egg wash)
Gives a shiny, golden finish. You can skip it and just brush with olive oil.
Tips & Tricks
- If the dough is too cold to roll, let it sit at room temperature for 30 minutes.
- Don't overfill the rolls or they'll burst open during baking.
- Use a sharp knife or pizza cutter to slice the dough strips cleanly.
- For extra crispiness, bake on a preheated pizza stone or baking sheet.
Pro Tips
Step-by-Step Instructions
1. Preheat and Prep
Preheat your oven to 400°F (200°C). Line a baking sheet with parchment paper or lightly grease it.
2. Roll the Dough
On a lightly floured surface, roll the pizza dough into a 12×16-inch rectangle. If it springs back, let it rest for 5 minutes.
3. Spread the Sauce
Spread the pizza sauce evenly over the dough, leaving a 1-inch border on the top edge. Use a spoon or offset spatula.
4. Add the Toppings
Sprinkle the mozzarella, Parmesan, and chopped pepperoni evenly over the sauce. Don't overload – about 2 cups of cheese total is plenty.
5. Roll It Up
Starting from the bottom edge, tightly roll the dough into a log. Pinch the seam to seal.
6. Slice the Rolls
Using a sharp knife or dental floss, cut the log into 12 equal slices (about 1.5 inches wide). Place them cut-side up on the prepared baking sheet, spacing them 2 inches apart.
7. Brush and Season
Brush the tops with the beaten egg or olive oil. Sprinkle with Italian seasoning and garlic powder.
8. Bake Until Golden
Bake for 15-18 minutes, until the rolls are golden brown and the cheese is bubbling at the edges. For extra crispiness, bake for an additional 2-3 minutes.
9. Cool and Serve
Let the rolls cool on the baking sheet for 5 minutes before serving. Serve warm with extra pizza sauce for dipping.
Delicious Variations
Veggie Delight
Skip the pepperoni and add sautéed bell peppers, onions, and mushrooms.
BBQ Chicken
Swap pizza sauce for BBQ sauce and use cooked shredded chicken and red onion.
Hawaiian
Use ham and pineapple chunks for a sweet and savory twist.
How to Store Easy Homemade Pizza Rolls
Refrigerator
Store in an airtight container in the fridge for up to 4 days.
Freezer
Freeze baked rolls in a single layer on a baking sheet, then transfer to a freezer bag for up to 2 months.
Reheating
Reheat in a 350°F (175°C) oven for 5-7 minutes to restore crispiness. Microwaving is quicker but makes them soft.
Frequently Asked Questions
Q: Can I use crescent roll dough instead of pizza dough?
Yes, you can use crescent roll dough for a lighter, flakier roll, but the baking time may be shorter – about 10-12 minutes. Just make sure to adjust and watch for golden brown.
Q: How do I prevent the rolls from unrolling during baking?
Make sure to pinch the seam firmly and place the rolls seam-side down on the baking sheet. Also, don't overfill – too much sauce or cheese can cause them to burst.
Q: Can I make these ahead of time?
Yes, you can assemble the rolls and refrigerate them unbaked for up to 24 hours. When ready to bake, add a few extra minutes to the baking time.
Q: What dipping sauce goes well with pizza rolls?
Marinara sauce, ranch dressing, or garlic butter are all excellent choices. Serve them warm with your favorite dip.
Q: Can I make them in an air fryer?
Absolutely. Preheat your air fryer to 375°F (190°C) and cook in a single layer for 8-10 minutes until golden and heated through.
If you try these Easy Homemade Pizza Rolls, let me know how they turn out in the comments below. Don't forget to share your favorite variations – I'm always looking for new ideas. See you on the trail.
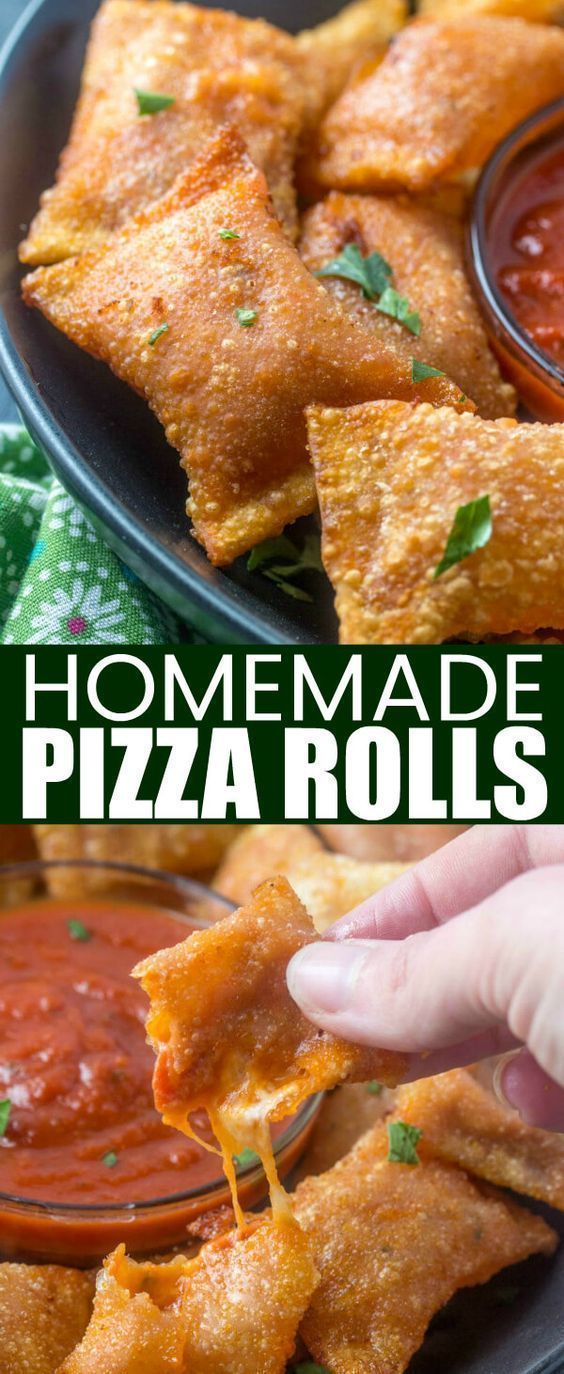
Easy Homemade Pizza Rolls
Easy Homemade Pizza Rolls with crispy golden crust, gooey cheese, and pepperoni. A 30-minute snack the whole family will love.
🧂 Ingredients
- 1 pound (450g) store-bought pizza dough
- 1/2 cup (120ml) pizza sauce
- 2 cups (200g) shredded mozzarella cheese
- 1/4 cup (25g) grated Parmesan cheese
- 2 ounces (56g) pepperoni slices, chopped
- 1 tablespoon (15ml) olive oil
- 1 teaspoon Italian seasoning
- 1/2 teaspoon garlic powder
- 1 egg, beaten (for egg wash)
📋 Instructions
- 1Preheat and Prep — Preheat your oven to 400°F (200°C). Line a baking sheet with parchment paper or lightly grease it.
- 2Roll the Dough — On a lightly floured surface, roll the pizza dough into a 12×16-inch rectangle. If it springs back, let it rest for 5 minutes.
- 3Spread the Sauce — Spread the pizza sauce evenly over the dough, leaving a 1-inch border on the top edge. Use a spoon or offset spatula.
- 4Add the Toppings — Sprinkle the mozzarella, Parmesan, and chopped pepperoni evenly over the sauce. Don't overload – about 2 cups of cheese total is plenty.
- 5Roll It Up — Starting from the bottom edge, tightly roll the dough into a log. Pinch the seam to seal.
- 6Slice the Rolls — Using a sharp knife or dental floss, cut the log into 12 equal slices (about 1.5 inches wide). Place them cut-side up on the prepared baking sheet, spacing them 2 inches apart.
- 7Brush and Season — Brush the tops with the beaten egg or olive oil. Sprinkle with Italian seasoning and garlic powder.
- 8Bake Until Golden — Bake for 15-18 minutes, until the rolls are golden brown and the cheese is bubbling at the edges. For extra crispiness, bake for an additional 2-3 minutes.
- 9Cool and Serve — Let the rolls cool on the baking sheet for 5 minutes before serving. Serve warm with extra pizza sauce for dipping.

Lars writes about outdoor adventure and minimalist gear, focusing on long-distance hiking and camping. He shares route planning tips, gear tests, and lessons from the trail, always emphasizing safety and leaving no trace. His writing is practical and seasoned, but he never claims to be an expert—just a passionate hiker.